Let's Make ..... An Old Oil Painting

I needed a frame for a painting, but couldn't find anything just the right size. The lock down in France (now extended to the 11th of May!) has meant that I can't get my usual supplies, and I have to be a little creative.
Luckily, I have a good number of supplies, as should any miniaturist. I regularly top up my supplies of clay, white paint, glue, gold leaf and gesso, and I keep all the cereal packets we use. It is amazing how necessity really does breed invention!
So here is a little tutorial to make a beautiful Old Masters painting in miniature, using fairly usual supplies.

First of all, find an image you like. I have a Pinterest page full of paintings that I like to use. Print it out on normal printer paper, and glue it on to a cereal packet for strength.
Paint on a layer of deco patch/mod podge/diluted PVA glue. This is optional, but for me necessary, because it gives that lovely sheen and crackled appearence of an oil painting.

Now make a wooden frame - I used bits of skirting board, but anything would be good, lolly sticks etc. You could also use stiff cardboard.

Paint the frame with a layer of gesso, to fill in any cracks and make the surface even. I gave mine a bit of a sand with an emery board when the gesso was dry.

Now glue on some narrow braid. You could also use lace or ribbon. I used superglue to be quick, and made sure the braid was glued on a straight as possible, we want to imitate carved wood.

Now add another layer of gesso, getting into all of the nooks and crannies. Allow this to dry completely through (go and make a cup of tea and find a biscuit or two)...

Now we are going to to some gilding. If you don't have gold leaf and size, you can paint your frame with gold paint (or any other colour you wish).
If you do want to gild the frame, paint it first with a bright red acrylic paint. This is a little authentic touch, and if you want your frame to look very old, a little red peeking through the gilding is a nice detail.

Paint the frame with layer of size - this is a special glue for gold leaf. I bought mine eight years ago, so a little goes a long way! You have to wait for about 15 minutes to let the size cure before you gently lay over a piece of gold leaf.
Then use a very soft brush to push the leaf into the details of the frame. If your gold leaf breaks, don't worry, you can patch it up with little pieces.

This is one of my favourite moments! Pure magic.


The frame starts to look quite realistic at this point...

Once you have gently smoothed on the gilding, you might want to stop there; this will give you quite a bright frame. And why not, it's very regal...

But I like to gunge mine up a bit by dry brushing brown acrylic paint in irregular splodges, to imitate the few centuries of dust, wax and grime that have tarnished the frame.

Yes, much better for my purposes (though I know some of you will think I've completely ruined the frame!)

Now, some of you can stop there if you want, but for me, I'd like a little more detail... turn over your painting...

Oh look, a cereal packet. Well, we can't have that, can we? I cut out a swatch of brown linen to fit the back of the frame, and glued it down.
You can use linen or cotton, or any other plain fabric. If it isn't brown, you can stain it with tea, or watercolours. Be inventive, according to your supplies.

I have a bag of these 3mm screw hooks, which I use for so many things (picture hanging, curtain tie-backs, chandelier hanging, door hooks etc.)
They come in very handy. I screwed in two on either side, about 1/4 from the top of the frame, being careful not to go through the whole frame...

Then I used waxed linen thread ...


And tied it neatly in the back...

You can sign the back of your painting, and note the original artist and date.

Nice and ancient, with lovely crackled oil paint


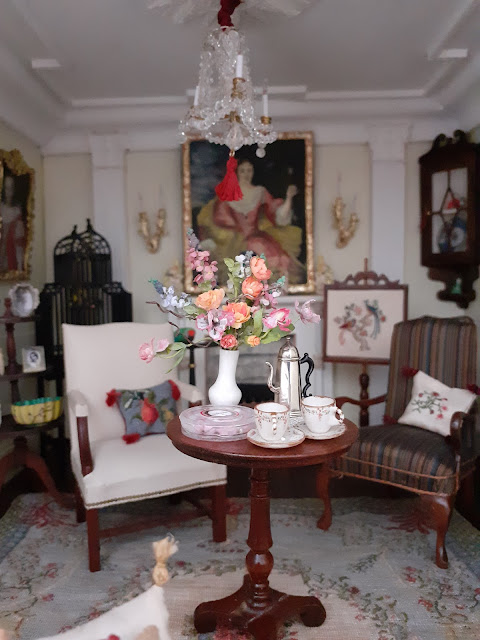
Who would know that this ornate frame was made out of bits and pieces of card and wood?
Jonquil

¡Estupendo trabajo!
ReplyDeleteExcellent tutorial Jonquil, and one so many of us can attain with the supplies we have on hand! I have tried to gold leaf in the past but found getting just the right amount of size was challenging. In a pinch, for those with less patience, gilders paste works nicely, too!
ReplyDeleteMe encanta. Ha quedado maravilloso.
ReplyDeleteUn saludo
Hi Jonquil! These tutorials are really helpful! I have been intending to try gilding things for ages.... now I am going to have to get over my fear and just do it! LOL! I really appreciate the step by step and the pictures of the ingredients used.... and the extra details on the back side are awesome! I use tiny hooks on some of my art too... but didn't think to put muslin backing or a signature! Bravo! Thank you for sharing! And stay well! :):)
ReplyDeleteA very interesting tutorial and the result is amazing.
ReplyDeleteGeneviève
Thank you for sharing this very creative tutorial.
ReplyDeleteYour frame is looking fantastic. Take care, stay well.
Drora
Beautiful! Thanks for the tutorial.
ReplyDeleteAn excellent tutorial Jonquil and best of all, it didn't cost a bean! It's a lovely addition to the room.
ReplyDeleteScrumptious old frame, who knew it was only made yesterday
ReplyDeleteYour old painting and antique frame are the PERFECT match for each other- Well Done Jonquil! :D
ReplyDeleteWhat a beautiful frame. I have not yet tried gilding, but this makes me want to have a go. Love the detailed finish of the back.
ReplyDeleteAnna