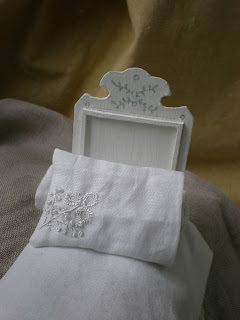
Let's Make a Pillow and Pillowcase!
Here's a little tutorial to show you how to make a pillow and a pillow case!
Pattern: Draw a rectangle to the dimensions that you need. Mine was 3cm by 5cm for a rectangular pillow. I added 5mm to each measurement to take into account the seams, so in total, 3.5 x 5.5 cm.
Draw your pattern on to the folded fabric, making sure that one long edge is on the fold. My fingers are on the folded edge.
Cut out your rectangle. I use pinking shears as the prevent fraying while you sew. If you don't have any, don't worry, just be gentle with your fabric edges, or coat them in a fray stop glue.
Anchor your thread and start to sew, using nice, even stiches.
Sew all three sides, but stop at about a finger's width from the end.
Turn your pillow right sides out. Use a long thin object to poke out the corners; I use the end of my propelling pencil without pencil leads.
I use small white seed beads as a stuffing. They are heavy and give a realistic weight and shape to the pillow. White is important as any other colour will show through your fabric.
Roll a smal piece of paper into a cone shape and insert into the hole. Pour the beads into the cone, this way you won't have hundreds of beads falling on the floor!
Finally, sew up the hole with tiny stitches....and you're done!
Pillow Case
The case needs to be about 1cm larger than your pillow, so my dimensions were 4.5 cm by 6.5 cm, cut on a fold (all in all, that makes a rectangle of 4.5cm by 13 cm).
I embroidered a little motif in white silk on my fabric first. You could do that, or you could use handkerchief material that often has a small embroidered design. Or you could leave it plain.
Again, use the pinking shears to make sure you don't fray the material. Leave one side cut normally. This will be the opening.
Open out your rectangle and glue the plain cut edge to make a hem, using tacky glue.
Fold the fabric over, wrong sides together.
Start to sew the edges together, but remember not to sew the 'hemmed' (glued) side!
Turn the pillow right sides out, and check the fit with the pillow. If it is too big, you can re-hem a side on the cover to make it smaller.
Then place your beautiful pillow on your bed and glow with pride!
Jonquil


buena idea la del relleno con bolitas, buen trabajo
ReplyDeleteHi Jonquil! Thank you for sharing this tutorial: it works well, because I always work like this for pillows!
ReplyDeleteGreetings, Ilona
Lovely pillow and tutorial!
ReplyDeleteHello Jonquil,
ReplyDeleteThank you for this tutorial. You make it look very easy and I love the idea of the seed beeds...I never would of thought of that. I really appreciate all your shared knowledge. You do everything so well It's great to have a teacher like you to help.
Big hug,
Giac
Another great tutorial, I shall be keeping this locked up in my mind for future use, I think even I could manage a few simple stitches, and seed bead stuffing is a great tip!
ReplyDeletereagrds
Andy xxx
What a wonderful tutorial and pillow.
ReplyDeleteYou show in a easy way to make such amazing things.
Thank you.
LG Alexandra
An excellent little tutorial and what lovely embroidery you've done on it.
ReplyDeleteGreat tutorial! Thanks a lot.
ReplyDeleteI can't wait to try it by myself. Keep on posting new tutorials.
I'm happy to share my blog with you;
http://ajarnpatrick.blogspot.com
so that you can have a look at my modest project. I am very new in the miniature field.
Regards
Patrick in Thailand